DIY: Build a mosaic garden table

Mosaics were already being made in ancient times, and when a hobby has persisted so persistently over the centuries, it's only natural to assume it's a lot of fun. To combine all this with something useful, we'll show you how to impressively decorate a garden table while also making it incredibly easy to maintain.
Materials required:
- An old table
- 240 grit sandpaper
- Wood color (optional)
- white spirit
- Solvent-free deep primer
- Different colored tiles, tile remnants or mosaic stones
- Old rags
- Pencil
- Assembly adhesive (for wood and stone)
- Flexible grout
- sponge
- soft cotton cloth
- Wooden end strips (optional)
- Assembly adhesive all material (optional)
You need this tool:
- Paint brush
- paint roller
- Pliers or mosaic pliers
- Silicone syringe
- jointing board

And this is how it works:
-
Refurbishment: If you want a complete renovation, or the table can no longer be saved in any other way, you must first sand your old table with 240-grit sandpaper and give it a new lease of life with the wood stain.
- Table preparation: Before you can apply your mosaic, the old surface of the table must be thoroughly sanded with fine sandpaper to ensure the primer and tile adhesive adhere properly. You can do this step by hand or with a sander. In any case, make sure you work evenly.
-
Dust-free: After sanding, you must thoroughly clean your table. It must be dry and free of dust, dirt, and grease. White spirit is particularly suitable for this purpose.
-
Protective treatment: To prevent your table from swelling due to the moisture in the tile adhesive, you should carefully apply Ceresit Solvent-Free Primer to your tabletop using a paint roller and let it dry overnight.
-
Drawing: Now sketch the desired motif onto the table top with a pencil.
-
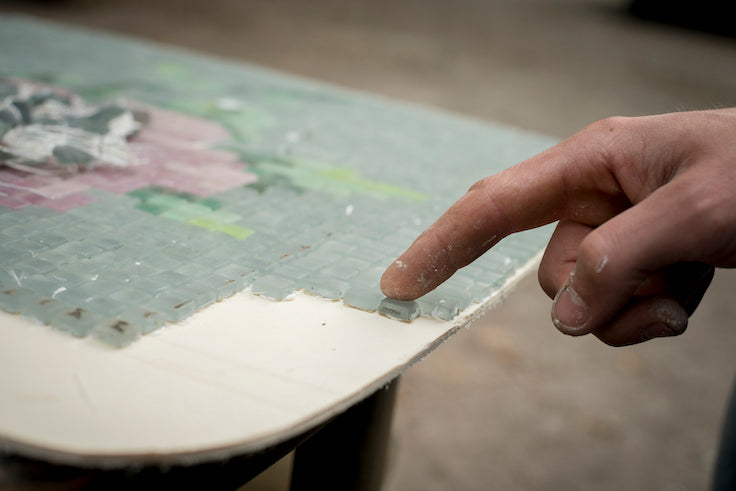
Puzzle: Using pliers or tile cutters, pinch the necessary pieces out of your tiles or select the right mosaic pieces. Then grab the silicone syringe and assemble your picture piece by piece by applying assembly adhesive to each individual mosaic fragment and gluing it directly to the board. You should maintain a gap of 2 to 5 millimeters between the tile pieces.
-
Grouting: After 2 to 3 hours of drying time, use your grouting trowel to apply the flexible grout diagonally until all joints are completely filled. Remove any excess grout. After another 15 minutes, use a sponge to smooth the joints and wash off any remaining grout. You can polish away any remaining grout with a cotton cloth.
- Clean finish: End strips give your table a clean edge. You can choose between wood, metal, and plastic. To prevent water from penetrating under the strips, we recommend filling the gaps with silicone.
Is DIY your world?
For you, old no longer means useless, broken no longer means unusable, and junk no longer means general waste? Great, then we've achieved our goal. In the future, you'll look at the world with different eyes and see potential where others see bulky waste.
You can find more ideas for great DIY projects in our book " Your Creative Garden ." Thanks to step-by-step instructions and helpful pictures, many of our DIY ideas can be recreated with children. The internet also has a lot to offer. So if you want to get active, the following websites are a good place to start:

We hope, of course, that you stay true to the DIY theme and wish you lots of fun and success with your next construction projects!

