DiY: Lanterns made from cans
 Did you have a stressful day and all you got on the table was a can of "something in tomato sauce"? No need to feel too guilty, because we'll show you how to make amazing lanterns out of what you thought was trash. We bet you'll get a few more cans tomorrow and quickly devour the contents because you need the empty ones. Here are the DIY instructions for "lanterns from cans."
This is what you need
Material:
- A few cans of food
- wooden slat
- A nail
- Varnishes in different colors
Tool:
- Hammer (alternatively: hole punch or sheet metal punch)
- felt-tip pen if necessary

A quick tip : You can buy a hole punch at a hardware store for just a few euros. We definitely recommend using this tool to ensure the holes in the can's sheet metal don't fray and are nice and evenly sized.
And this is how it works
Step 1: Clean
Clean the cans thoroughly and remove all labels.
Step 2: Drill holes
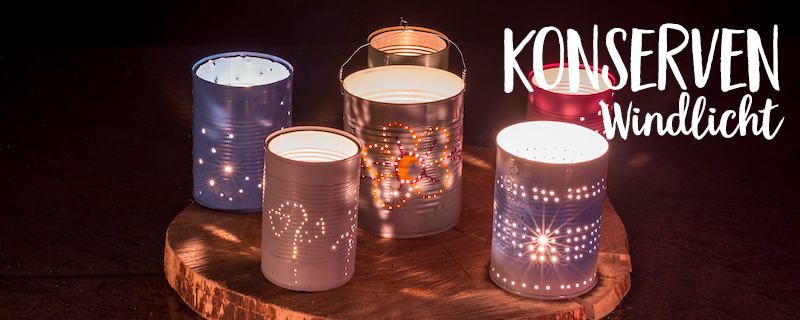
 Now, using a hammer and nail, punch holes into the cans so the candlelight can shine through. You can decide how large the holes are. There are countless ways to punch shapes, patterns, or designs into the can walls. Alternatively, you can also use a hole punch.
Step 3: Now it gets colorful!
Now you can spray paint your can(s) however you like—plain or colorful, striped or patterned. You can creatively design the lanterns to match your surroundings. Once you're finished, you'll need to let the paint dry for a few hours. 
Is DIY your world?
There are many good reasons to make things yourself. It saves resources, sometimes even money, it's fun, and you learn a lot. What's more, there's a special magic in the things you've created with your own hands and passion. It's a wonderful feeling you can't buy in any store and for any amount of money.
You can find more ideas for great DIY projects in our book " Your Creative Garden ." Thanks to step-by-step instructions and helpful pictures, many of our DIY ideas can be recreated with children. The internet also has a lot to offer. So if you want to get active, the following websites are a good place to start:
We hope, of course, that you stay true to the DIY theme and wish you lots of fun and success with your next construction projects!
