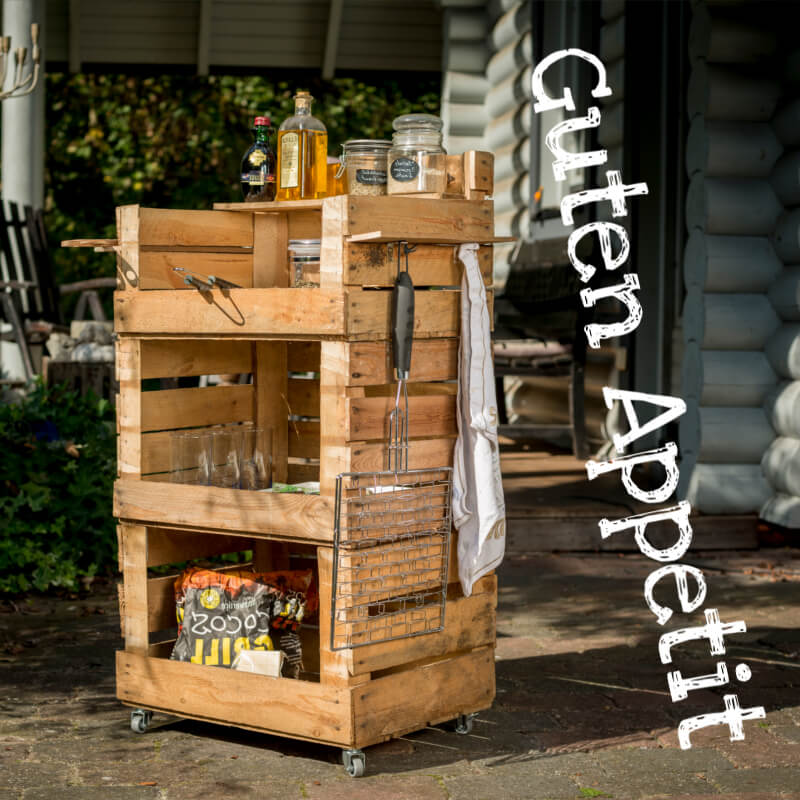
Build a barbecue side table from wooden crates

No summer is complete without a barbecue with friends. But where do you put all those salads, bread, sauces, and especially that beer supply? How convenient that you have a rolling side table handy. Don't you? Get to work!

This is what you need
Tools:
- Jigsaw with metal saw blade
- screwdriver
Material:
- Three wooden boxes
- screws
- 14 angles
- Hook
- Four roles
- wood glue
And off we go
- Grab the saw : First, remove the top three boards on each of the long sides of each box, leaving only the bottom board standing. Once you've done that, take one of the three boxes and saw off the top slat on both short sides. On this box, also shorten two of the corner posts—the ones on the long side with the sawn-off slats. Cut them off at the top so that they line up with the remaining boards on the short sides. This box will be the top later.
"If you don't have three identical crates, things get a little more difficult. To get three wooden crates of the same variety, just ask the fruit vendor at the market. He'll probably give you three crates for a few euros."
-
Angles : Take one of the two lower crates and screw a bracket to each of the four corner posts inside, so that the top surface of the bracket is flush with the corner posts. Now you can simply place the other crate on top and screw the brackets to the floorboards. In the same way, screw the top crate onto the resulting crate tower.
 Once you have finished sawing the boxes, you can attach the angles
 - Shelves: Now, use the saw to shorten two of the remaining slats from the first step so that they are as long as the depth of the crate. Then, attach them to the outside of the top crate with two brackets each. This will give your grill side table two additional shelves on the left and right.
-
Now it's time to get slanted : Next, bevel one of the remaining sawn-off boards at the ends so that it fits flush between the two squared pieces of timber at the back of the top box. Attach it with a bracket on the left and right and screws.
 After screwing the boxes together, the shelves are attached
"For all screw fixations, you can glue the wood together before screwing. This provides additional stability."
- The final touches: Now screw one of the remaining full-length slats to the board that's attached between the squared timbers. Simply screw it to the wooden edges of the top box. In principle, using strong nails should be sufficient. Finally, screw the hooks into the bottom of the two shelves on the outer wall and screw the four casters to the bottom.