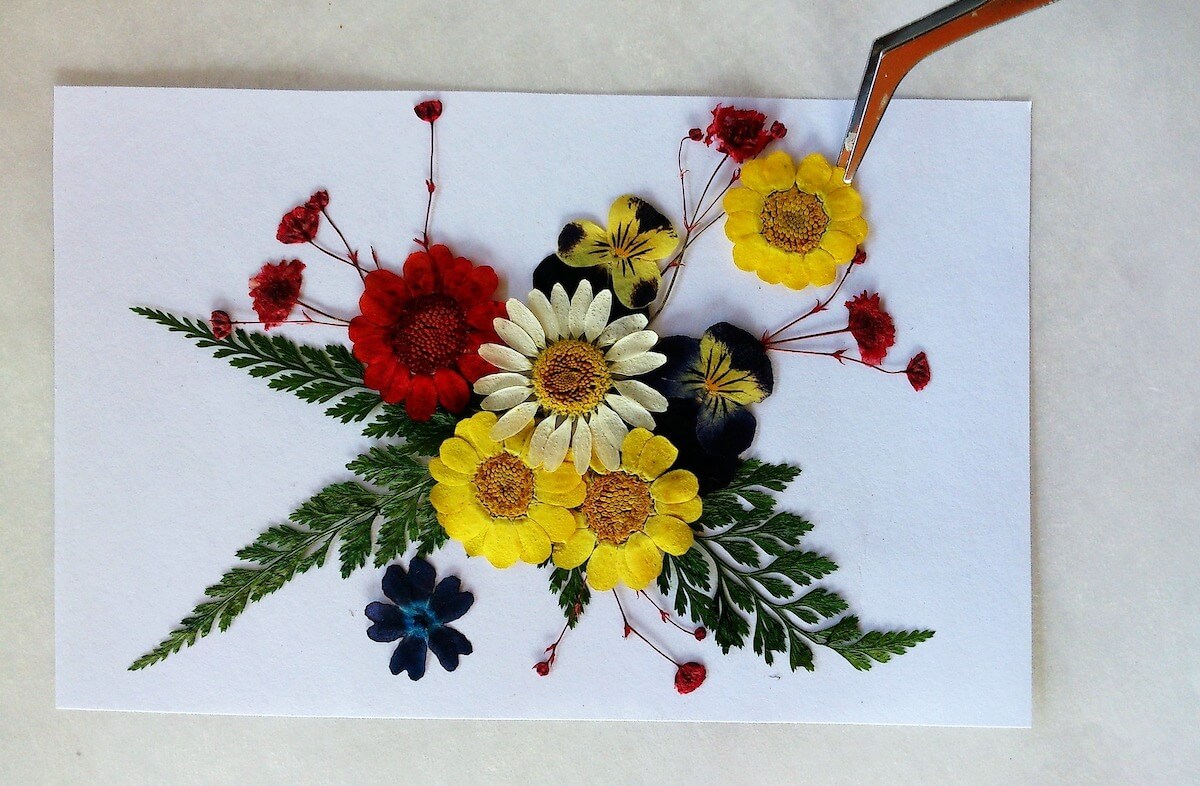
Pressing flowers for eternity

As soon as summer arrives, you can enjoy the splendor of flowers everywhere. How wonderful when everything is in bloom, isn't it? Unfortunately, this time always seems to pass far too quickly. Because as beautiful as they are, flowers don't last long. So how about capturing this sea of color in your home? We tell you: where there's a will, there's a way. Simply press your flowers and make them last forever. Here you can find out how, what you should definitely keep in mind, and which little tricks are really great. We hope you enjoy pressing flowers!
Which flowers are suitable for pressing?
Not all flowers are equally suitable for pressing. Thick, fleshy, or spherical flowers, such as roses, are particularly difficult to press because they usually contain too much moisture and quickly begin to rot. Thin, flat flowers, on the other hand, are easier. Whether they're big or small doesn't matter; it's the thickness that counts. Daisies , baby's breath, jasmine, violets, and geraniums are all well-suited. So that you don't miss out on those beautiful red roses from your garden, it's a good idea to use individual petals rather than pressing them whole.


Flower pressing - how does it actually work?
Flower pressing isn't difficult at all, and it's a great way to engage with flora and fauna and learn about plants, even with children. But what exactly happens during the pressing process? It's actually quite easy to explain. Pressing removes the moisture from the flowers. This way, they retain their current color and look as wonderfully colorful as when you picked them. And so you can finally get started, here are the step-by-step instructions that apply to every flower:

Step 1: Pick flowers
It's best to pick the flowers when they're in full bloom. This is actually very important, because you want them to last a long time, and above all, look beautiful for a long time. This won't work if they're already wilted when you pick them. Choose the prettiest flowers you can find, and you'll also achieve beautiful results when pressing them.
Step 2: Dry flowers
After you've selected and picked the prettiest flowers, be sure to let them dry first. Any moisture from the recent rain or morning dew shouldn't remain on the flowers before pressing. Simply lay the flowers side by side on a napkin or paper towel and let them dry overnight.
Step 3: Lay flat
No matter which pressing method (see "Three Ways to Press Flowers" below) you choose, this step is always important. Lay your flowers flat on a pre-cut piece of paper (blotting paper works great). You can also place several flowers next to each other, just make sure they're not touching. Then cover them with another piece of blotting paper and place them in the flower press , in a book, or between two tiles.
Three ways to press flowers:
Pressing flowers with the flower press
As the name suggests, the flower press is specifically designed for pressing flowers. Accordingly, this is arguably the "best" method for preserving flowers in their current state. The flower press typically consists of two wooden discs that can be held together at the four corners with screws and pressed together. Here, too, it's important to place the flowers between two layers of paper or cardboard so they can absorb the moisture. Once you've filled the flower press this far, all you need to do is be patient. Take a look inside the press every now and then to check that everything is still in place. After a few weeks, your flowers will be ready! 
Pressing flowers with a book
If you don't have a flower press or are too lazy to build one, you can also use something that everyone probably has at home: a thick book. Here, too, it is important to place the flowers between two layers of paper AND cardboard. That's right, we specifically said "cardboard" because when pressing the flowers in the book there is a risk that the moisture from the flower will migrate into the pages of the book. This would quickly ruin your book. So instead, take two additional pieces of cardboard to "wrap" the flowers in on both sides. Place the whole thing in the middle of your book. Then just close the book and weigh it down if necessary. You should change the paper every few days. After a few weeks, the flowers will be ready!
Flower presses in the microwave
This is probably the fastest way to press flowers, as you can admire your results in just a few minutes. For this method, you'll also need paper and cardboard (two sheets each). You'll also need two ceramic tiles. Place the flower in the center, then add a layer of blotting paper on top and bottom, a layer of cardboard, and one tile each. You can secure the whole thing with rubber bands at the corners and then microwave it. On the highest setting, you should be able to admire your results within a minute. If you want to proceed cautiously, that's fine too—not everyone is as daredevil as we are ;-)
What to do with pressed flowers?