DiY: Build your own Tic-Tac-Toe game

Just type "Tic Tac Toe" into Google. In addition to results for the celebrated cult band from the 90s (don't know them? Man, we're old ;-)), you'll also find this fun game: Tic Tac Toe. "Connect Three" is, of course, most fun with friends in the garden. Learn how to build the perfect game board here:
Materials:
- A piece of tree trunk
- Clear coat
- Pebbles
- Acrylic paints
Tools:
- ax
- two goats
- (Chainsaw)
- sandpaper
- soldering iron
- Paint brush
 This is what you need for your Tic Tac Toe game
A quick tip for choosing wood: Maple, birch, and beech are beautiful, but they're not particularly resistant to external influences. This doesn't matter if you later treat the two cut surfaces with a glaze. Oak and robinia, on the other hand, remain permanently beautiful even untreated.
And this is how you build the game:
Step 1: Prepare the tree trunk 
The first step is to place the tree trunk on the ground and use an axe to remove the bark and bast—these are the two wood elements that easily retain water and are therefore attractive to fungi and mold. If you don't have an axe handy, you can also use a spade or a hatchet.
Step 2: Cut a slice:

A little tip: Before you saw, there should be no sand or dirt on the wood, otherwise the saw blade will become blunt.
Step 3: Sand, sand, sand
To ensure your game board feels good and doesn't hurt anyone, it's time to sand it. You need to thoroughly sand both sides and the edge. You can round the edges slightly, which will make the board feel even better. Then, use a cloth to remove any chips and dust.
Step 4: Burn in the playing field
Now you can draw the game board with a pencil and a set square, and then burn it in with a soldering iron. Alternatively, if you want to save yourself a little work, you can just trace the lines with a waterproof felt-tip pen.
 You can't paint with a soldering iron like you can with a pen. Lines are burned in dot by dot. This makes the process tedious and time-consuming, but it looks all the better in the end.
Step 5: Make it weatherproof:
Depending on the wood used, you'll now need to give the game board another coat of clear varnish. You can use a clear varnish from a spray can or a brush-on varnish.
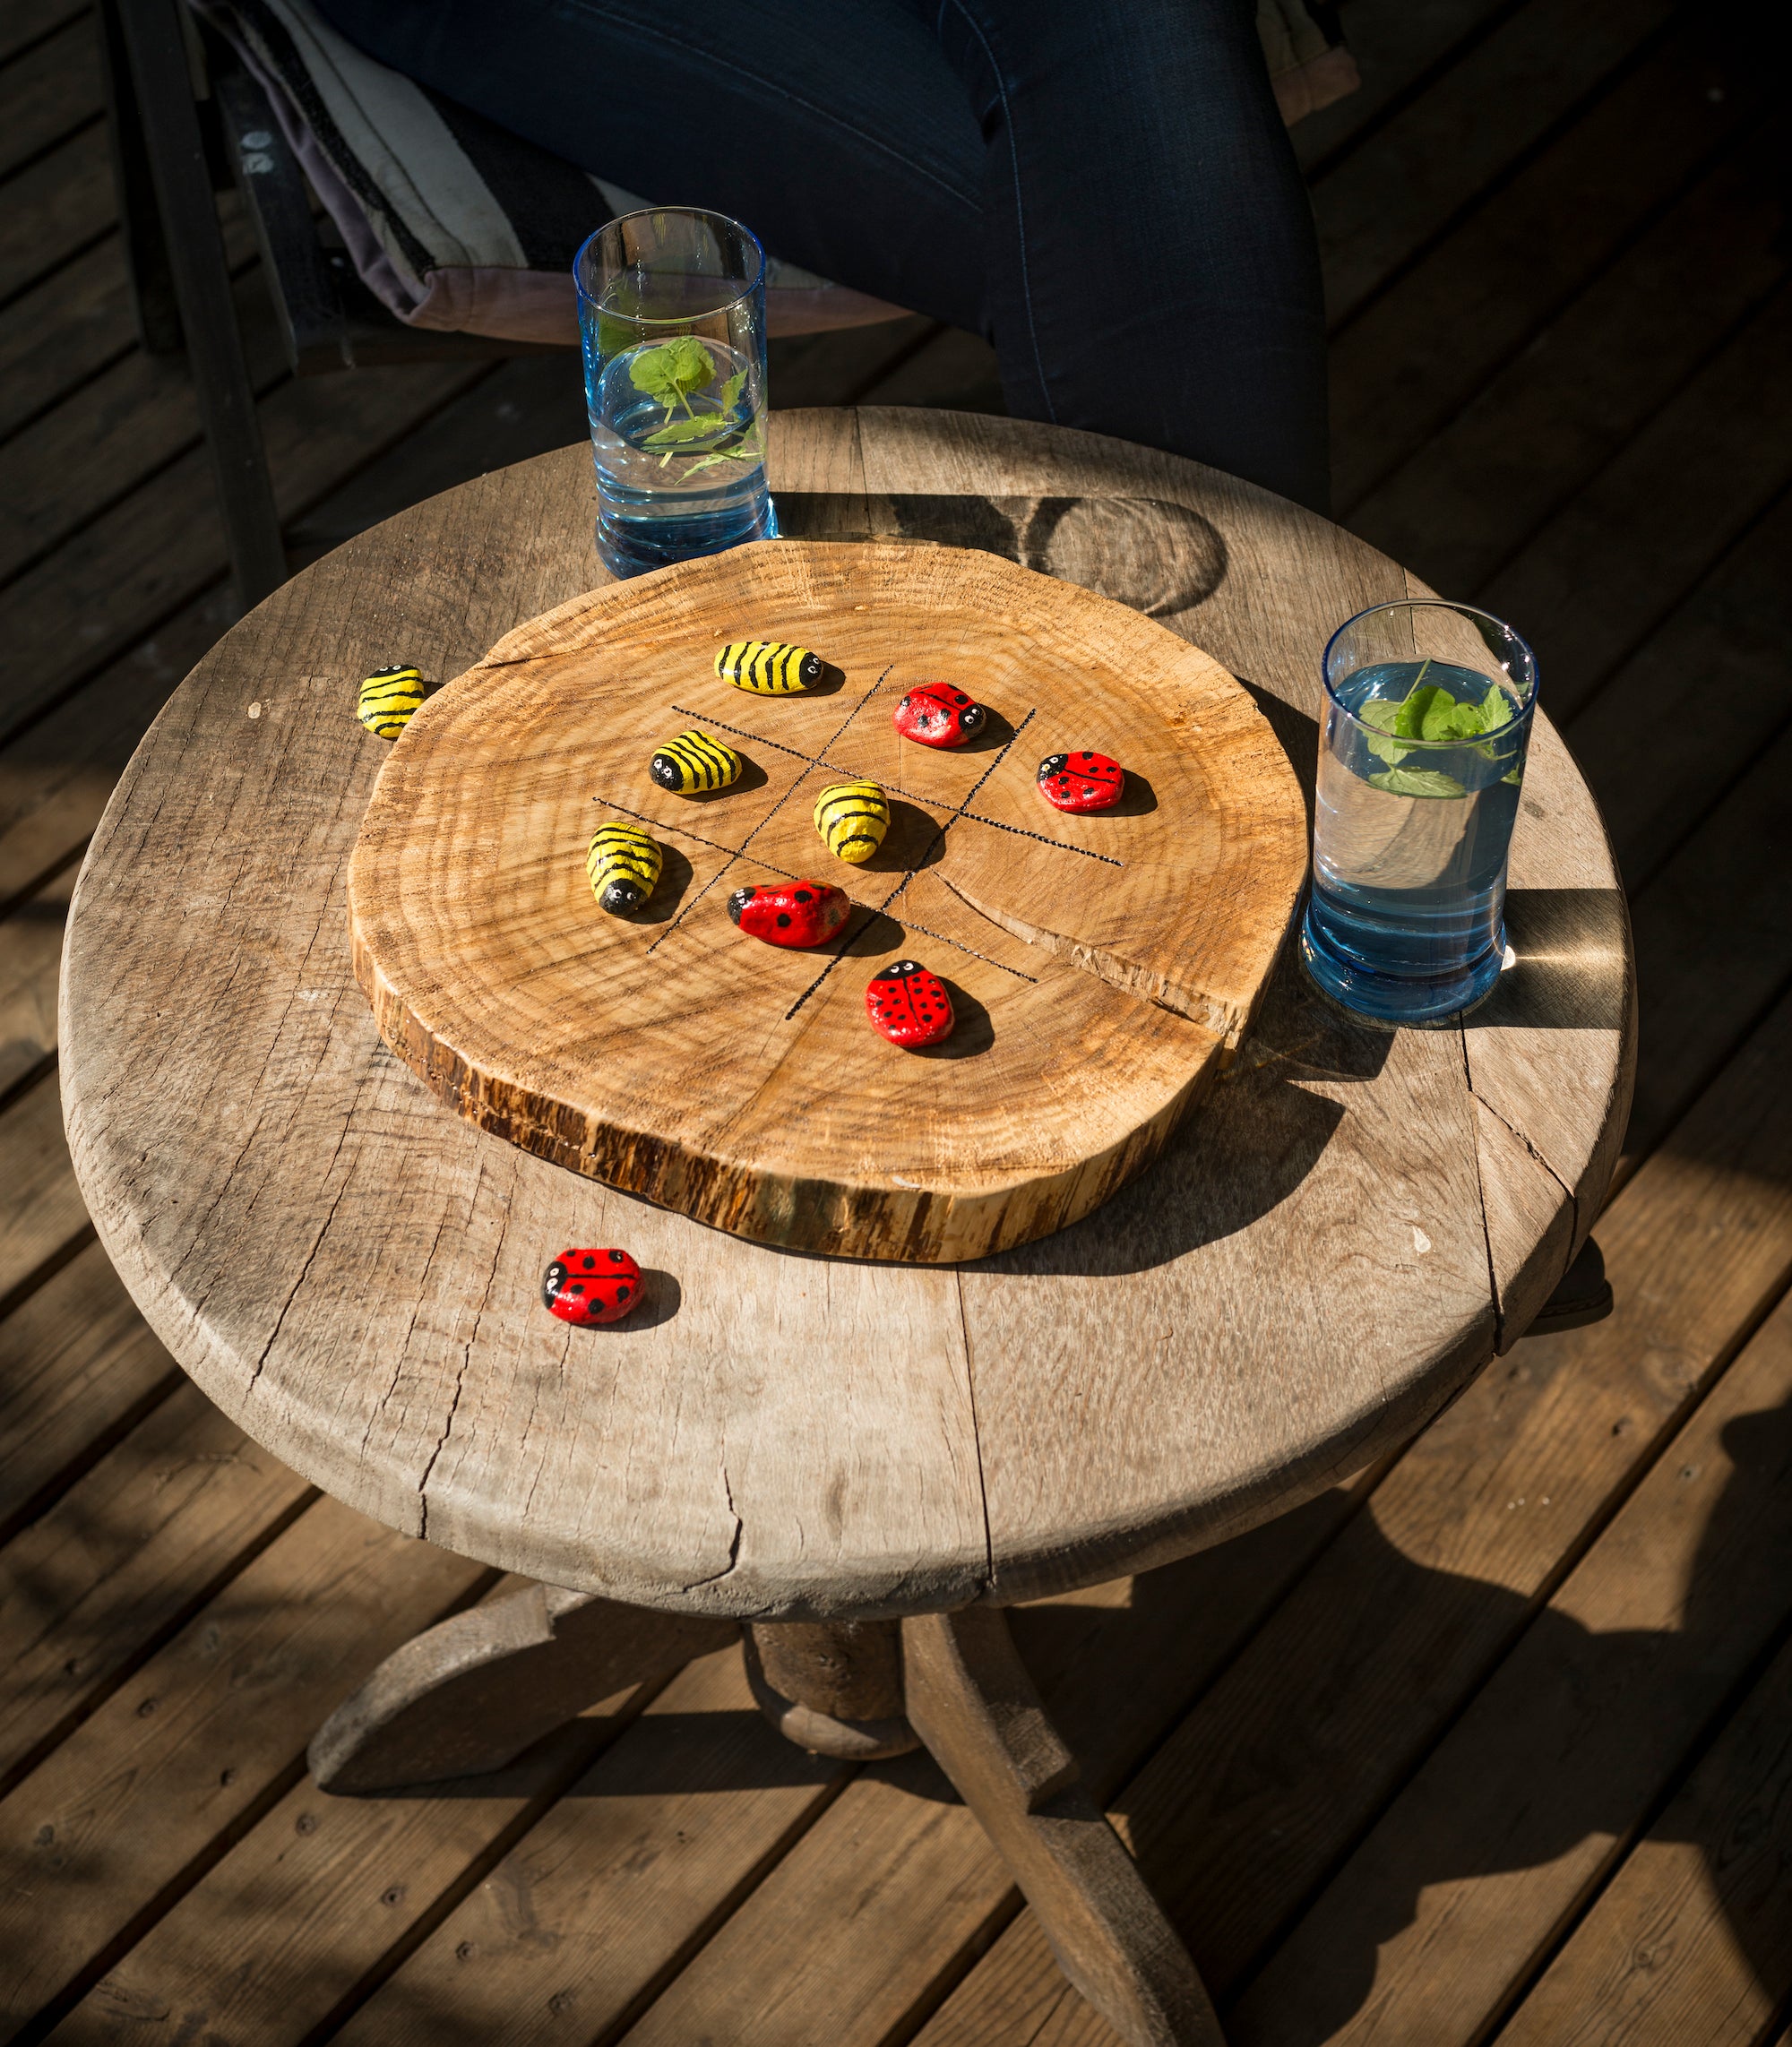
Step 6: Paint the game pieces
Finally, take your ten roughly equal-sized pebbles. They should be at least the size of a two-euro coin and have a flat surface on one side, if possible. Otherwise, they'll roll off the board later. If you don't like collecting, you can also buy a bag of pebbles from a hardware store. Remove any dirt from the pebbles by washing them and letting them dry. Then, grab a brush and paint them with acrylic paints—any way you like, as long as five of them look the same. Once the pebbles are dry, you'll need to seal them with clear varnish.
Is DIY your world?
There are many good reasons to make things yourself. It saves resources, sometimes even money, it's fun, and you learn a lot. What's more, there's a special magic in the things you've created with your own hands and passion. It's a wonderful feeling you can't buy in any store and for any amount of money.You can find more ideas for great DIY projects in our book "Your Creative Garden." Thanks to step-by-step instructions and helpful pictures, many of our DIY ideas can be recreated with children. The internet also has a lot to offer. So if you want to get active, the following websites are a good place to start:
 We hope, of course, that you stay true to the DIY theme and wish you lots of fun and success with your next construction projects!
